Form - Project Step Instructions
Description
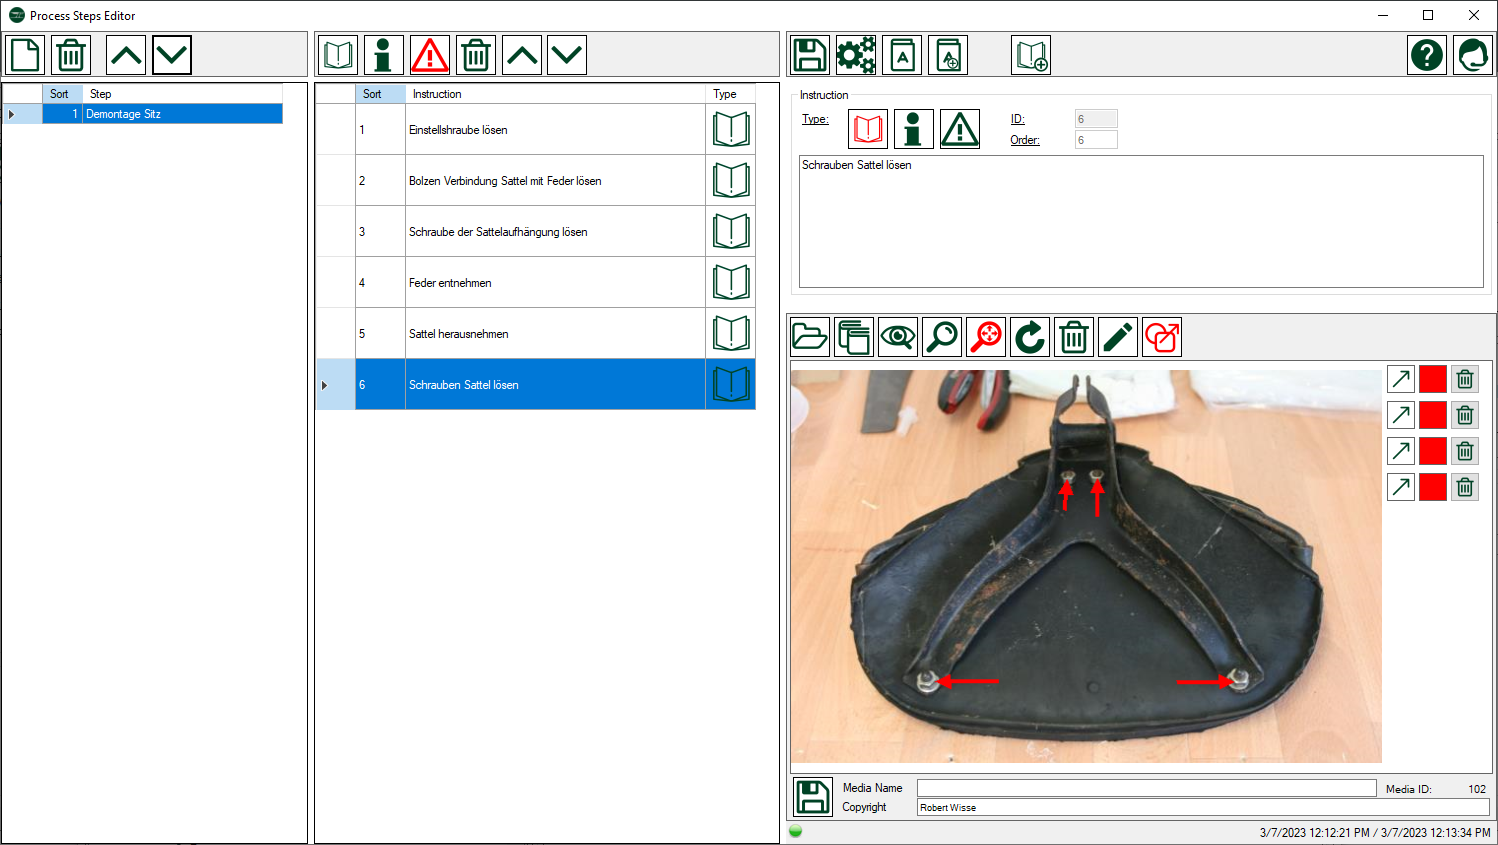
This chapter describes process step instructions. How to record process steps is described in a separate chapter.
A process step consists of one or more instructions, informations and/or warnings.
 : An instruction is a description of an activity such as: <Unscrew the saddle>.
 : A piece of information is an additional note to an instruction, e.g.: <It is best to use an M10 open-end wrench to loosen the screws>
 : A warning is an important additional comment to an instruction, e.g.: <Caution: the spring is under tension, it jumps out when the screw is loosened!>
Copy part names
If, during the description of an instruction, you want to use official part names and reference numbers from the parts list, you can open the parts list for copying  . At the top left corner of the parts list is a button
  to enable copy mode. When active
  , the part name and reference number is copied to the text of the instruction at the cursor location each time you click on a part. The acquired data has the following format: [part name] (group reference number, part reference number), e.g. [Adjusting Screw] (3-66). 3 designates the group reference and 66 the part reference in the exploded view. To avoid an unintentional takeover, you should deactivate the copy mode or close the spare parts catalogue.
Copy standard words from the dictionary
The dictionary is a small but effective aid, on the one hand to easily adopt standard terms such as loosen, unscrew, separate, remove, pull off etc. and on the other hand to convert such terms correctly when automatically creating an assembly process from a disassembly process, e.g. <loosen> becomes <tighten>. A detailed description of the dictionary can be found here.
To copy words, click on the button  . Now, by double-clicking on a word, you can copy it to the instruction text at the position of the cursor.
Auto add mode
When disassembling, it is sometimes useful to take several pictures in a row and then write the instructions for each picture. If you have connected a camera to Easy Classics and enabled scan mode in the media manager, you can use auto add mode for instructions.
- Turn on scan mode in the media manager

- Activate the auto add mode by clicking the button

- Take the desired pictures with your camera.
- A new instruction is automatically added for each image.
- After the last picture, you can describe the newly captured instructions.
Add and sort instructions
Menue
|
Add instruction | Adds an instruction to the end of the list |
|
Add information | Adds an information to the end of the list |
|
Add warning | Adds a warning ot the end of the list |
| Delete | Deletes the current record | |
| Move up | Moves an instruction up in the list | |
| Move down | Moves an instruction down in the list |
Data
| Spalte | Datentyp | Beschreibung |
| Instruction | text | Description of the instruction |
| Sort | disabled | The sort is automatically managed |
| Typ | image | Displays the type: instruction, information or warning |
Anweisungen Detail
Menü
| Save | Save the current changes | |
|
Parts list | Opens the parts list to copy part names and reference numbers |
|
Dictionary | Opens the dictionary to copy words |
 |
Manage words | Opens the Dictionary to manage words |
|
Auto New | If activated (red) then a new instruction ist added automatically after inserting an image. |
| Online Hilfe | Opens this help toppic | |
| Support | Öffnet das Eingabefenster um Supportanfragen zu übermitteln |
Daten
| Spalte | Datentyp | Beschreibung |
| Type | image | The red image indicates whether it is an instruction, information or warning. To change the type you have to click on one of the symbols. |
| Image | Media Manager | An image to describe an instruction. See media manager. |